Step 1
Click on Confirm in the Dashboard menu or choose Backlog in the blue menu bar at the top and click on the status Confirm for an invoice.
Step 2
On the right-hand side, the invoice is shown. On the left-hand side, the information for the entry is shown. In this screen you can select one of the follow-up actions:

- Approve: This approves the document and its entry and moves it on to the next stage.
- Reject: This rejects the document and its entry and places it on the Reject status.
- Skip: The document remains on Confirm. You can view it again at a later time.
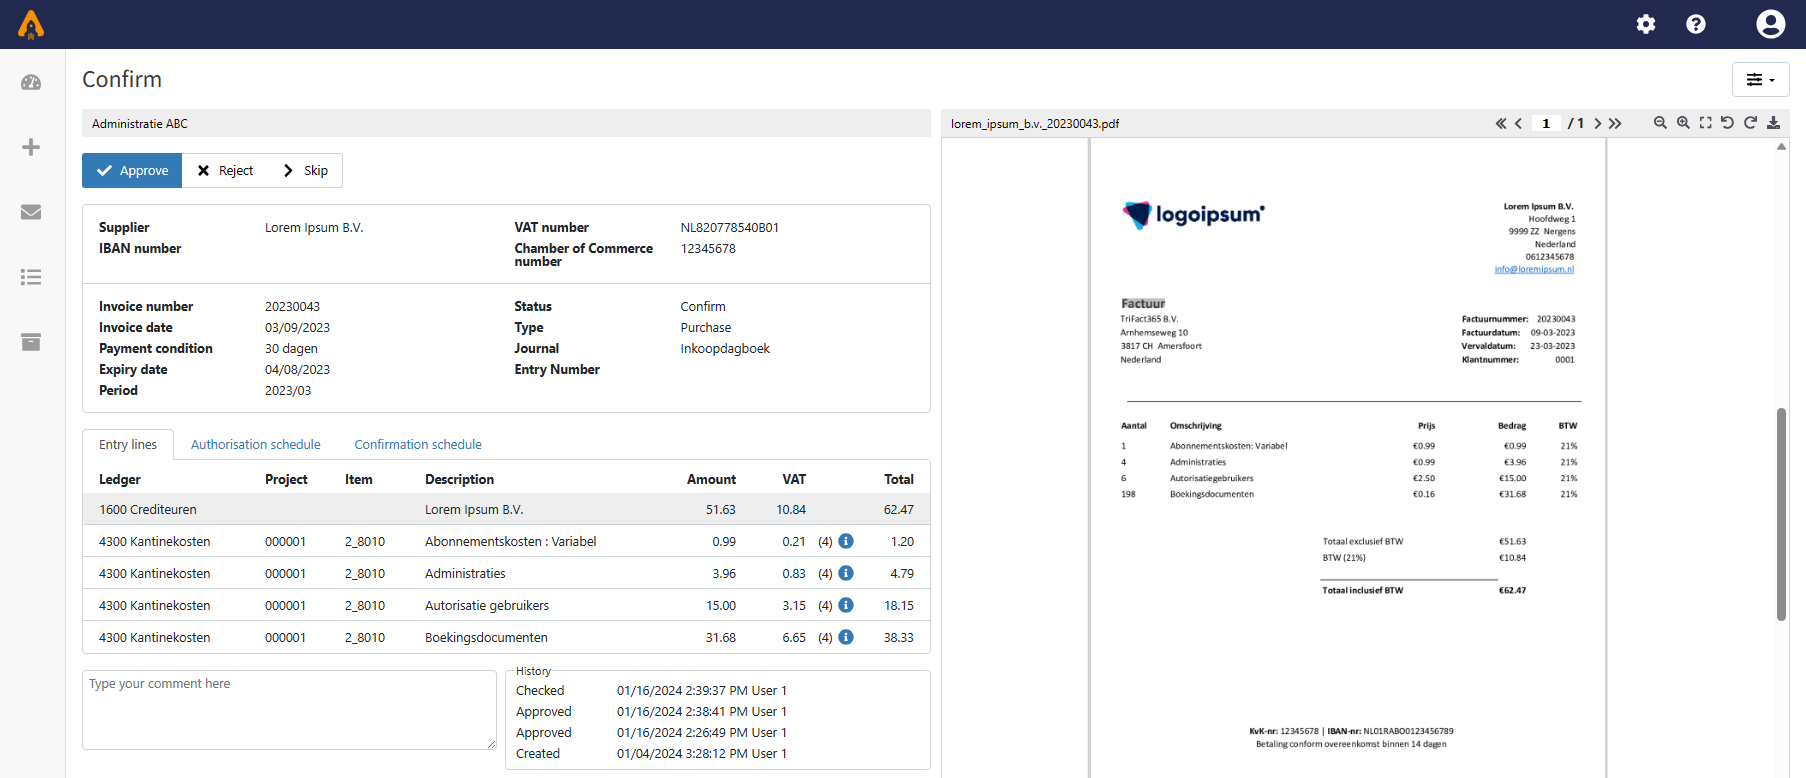
Add comment and History
Additionally you can add a comment in the white area below the confirmation schedule. After approving, rejecting or skipping the document, it will be added to the History on the right-hand side.
Display options
Using the Display Options, you can change the layout of the screen. For example, you can move the document to the left side and make the document fit the frame.