Before you start:
- Add the right Confirmation to the User(s) who need to confirm invoices.
- Add administration(s) to the User(s) for which they need to authorise. See for more information this link.
- Go to Settings (cogwheel) > Administrations, check Confirmation for the relevant administration(s) and click Save.
- Go to Settings (cogwheel) > Confirmation, then click Add.
- Give the confirmation schedule a recognizable description.
Set up workflow
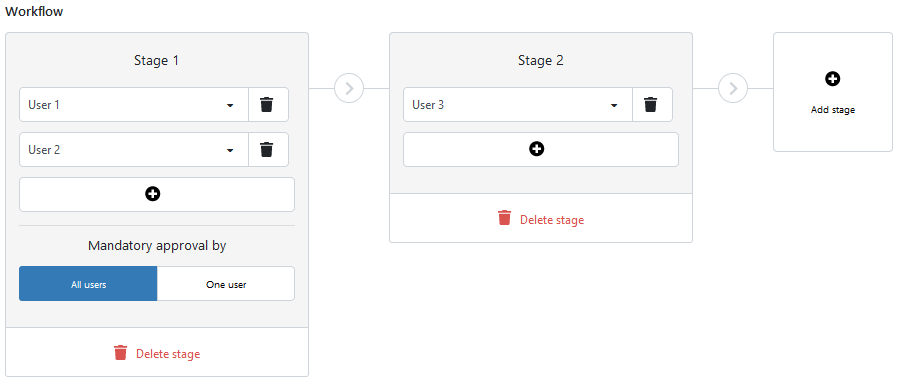
Next, you need to set up the workflow. This contains one or more phases containing one or more Users who will approve the documents. The document to be confirmed first passes through phase 1. When this is completed, the document moves on to phase 2, etc. A schedule can contain up to 5 phases.
- Click the button with the Plus sign. Phase 1 becomes available.
- Select a User in Phase 1.
- If necessary, add another User using the Plus button. You can add a maximum of 10 Users to one phase.
- When you add more than one User to a phase, an additional setting becomes available:
- All Users: All Users in this phase are required to approve the document.
- One User: One of the Users in this phase must approve the document.
- Click Add Phase to add a new phase, up to a maximum of 5 phases.
- Click Delete Phase to remove a phase from the workflow.
Set up administration
Finally, you determine which administration(s) the confirmation schedule should apply to. You can choose:
- All administrations: The confirmation schedule can be used for all administrations that have Confirmation enabled.
- Selected administrations: The confirmation schedule can be used for a selection of administrations that have Confirmation enabled. You can select these by moving them from ‘Available administrations’ to ‘Selected administrations’.