Clicking in the column status on Check in the screen Backlog will show you the journal entry proposal presented by TriFact365. This proposal needs to be checked and can be corrected.
1. Matching creditor/debtor
First check if the creditor/debtor is matched.
Creditor/Debtor is successfully matched

Creditor/Debtor is not matched

Type a part of the name or number of the creditor/debtor and select it.
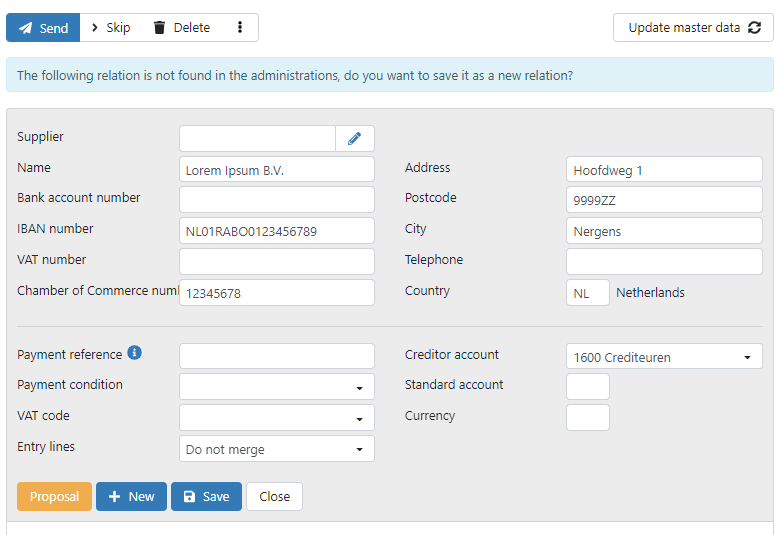
If a Creditor/Debtor is not known in the administration use the Pencil to create a new creditor/debtor in TriFact365 and the accounting software.
TriFact365 presents a proposal for a new relation

2. Checking invoice data
After matching the creditor/debtor, the invoice data should be checked and maybe corrected (e.g., invoice number and invoice date). Click one of the links for tips regarding this check.
- Check duplicate invoices
- Invoice number is entry number with sales invoice
- Set up default payment reference for purchase and sales invoice
- Standard journal for purchase/sales invoices
- Foreign currency
Mark recognised data
Click on the field of, for instance, the Invoice number and in the PDF viewer a green mark is shown where the data has been recognised.

Select/copy data
By using the cursor in the PDF viewer, you can select one piece of information by clicking it or multiple pieces by dragging a box containing the information. Click in a field to copy the data to that field.
3. Checking journal entry
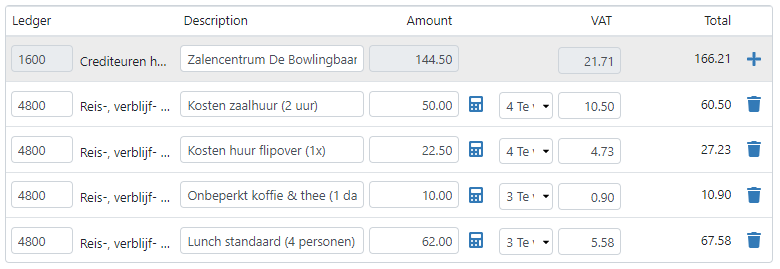
Underneath the invoice data the journal entry lines are shown. Using the Green plus or the Red minus will add or delete entry lines.

Credit
Checking this box will indicate the journal entry is a credit invoice. If this checkbox works with your accounting software? Please check this link.
Accrual entry
Some accounting software have the option to make an accrual entry. Checking this box will add two columns to the journal entry lines, From and Up to. More information about this option can be found here.
Merge entry lines
When using the option Automatic line recognition you can merge the individual journal entry lines into one line per VAT-code by checking the box Merge entry lines. For more information click here.
Ledger and other dimensions
Every journal line contains the column Ledger. By default, the ledger presented is the one saved in the settings for the relation. The ledger and other dimensions can manually be changed if needed.
Want to add extra dimensions? Check this link.
Descriptions
By default, the name of the creditor/debtor is shown in de description field. Do you want a different default value? Check this link to see which labels could be used to create a custom-made description.
Amount and VAT
The recognised value of the invoice, excluding VAT, is presented in the field Amount. Combining the Amount and VAT-code will result in a calculated VAT amount. When needed, the amounts and/or VAT-code can be changed.
See the links below for more functions regarding the Amount and VAT.
4. Adding a note to the History
A note can be added in the white box below the journal entry lines. After sending the journal entry lines the note will be added to the History.

As an additional function TriFact365 has the possibility to send the History as Audit trail, in the form of a PDF file, to some of the accounting software. For more information about this function see this link .
5. Additional functions
Instruction tour
Clicking the Question mark, at the top right corner of the screen, allows you to start the Instruction tour. This tour will give you information about the functions in the screen Check or other parts of the TriFact365 portal.
Keyboard shortcuts
The screen Check contains several keyboard shortcuts for quickly check and process the proposal. See this link for more information.
Updating Master data

If master data is changed in the accounting software, you need to update this data in TriFact365. For updating the master data use one of the following options:
Settings > Administrations > Three dots > Edit > Update master data
or
Backlog > Status: Check > Update master data
Display options
With the Display options you can check in or out dimensions or place the journal entry lines underneath the PDF viewer. More information about the display options is found in this link.